Configure Connection Details of Secrets Management Tools
As a security best practice, you store sensitive data such as database credentials, application credentials, authentication tokens, API keys, and other secrets in a secrets management tool. To access the tools and technologies in your cloud environments from within the Calibo Accelerate platform, the platform must have authenticated access to your secrets management tool. You must provide the connection details of your secrets management tool in the Calibo Accelerate platform and assign the read-only permissions to the Calibo Accelerate platform in your secrets management tools.
Currently, the Calibo Accelerate platform supports the following secrets management tools:
-
AWS Secrets Manager
-
Azure Key Vault
-
Google Secret Manager
To provide the connection details of secrets management tools in the Calibo Accelerate platform, perform these steps:
-
Sign in to the Calibo Accelerate platform and click Configuration in the left navigation pane.
- On the Platform Setup screen, on the Cloud Platform, Tools & Technologies tile, click Configure.
- On the Cloud Platform, Tools & Technologies screen, in the Secret Management section, click Configure.
(After you save connection details for at least one secrets management tool, you see the Modify button here.)
-
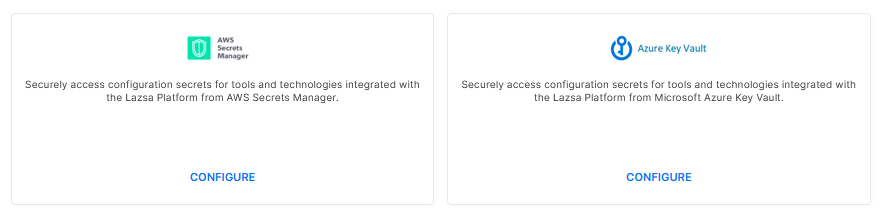
On the Secret Management screen, click the AWS Secrets Manager tile, Azure Key Vault tile or Google Secret Manager tile to configure the connection properties of your active accounts for these tools.
 AWS Secrets Manager
-
To save the connection properties of your AWS Secrets Manager account, provide the following details:
Field Description Name Give a name to your configuration. Your AWS Secrets Manager connection details are saved by this name in the Calibo Accelerate platform. Description Provide a description of your configuration. When you save multiple connection details in the Calibo Accelerate platform, a brief description always helps you identify the saved connection details easily. Region AWS Region that specifies where your AWS Secrets Manager resources are managed. Master AWS Account Calibo's Master AWS Account ID is auto-populated. You need to mention this ID in the IAM role policy that you create to allow the Calibo Accelerate platform to access your AWS Secrets Manager. If you use the CFT for IAM role policy provided by Calibo, this ID is already mentioned in the template. External ID This is the unique identifier generated by Calibo. You need to mention this ID in the IAM role policy that you create to allow the Calibo Accelerate platform to access your AWS Secrets Manager. If you use the CFT for IAM role policy provided by Calibo, this ID is already mentioned in the template. Cross Account Role ARN After you create an IAM role and attach a policy to establish a trusted relationship between your AWS account and Calibo's account, you can provide the ARN here. Download CFT Download this CloudFormation Template provided by Calibo. This template creates an IAM role and the required policy to allow the Calibo Accelerate platform to access your AWS Secrets Manager. - To password-protect your AWS Secrets Manager connection details, enable the Secure configuration details with a password option, enter a password, and then retype it to confirm.
This is optional but recommended. When you share the connection details with multiple users, password protection helps you ensure authorized access to the connection details.
-
Click Test Connection to check if you can connect to the configured AWS Secrets Manager account successfully.
-
After you save and activate the configured connection details, you can see them listed on the Cloud Platform, Tools & Technologies screen.
Azure Key Vault
-
To save the connection properties of your Azure Key Vault subscription, provide the following details :
Field Description Name Give a name to your configuration. Your Azure Key Vault connection details are saved by this name in the Calibo Accelerate platform. Description Provide a description of your configuration. When you save multiple connection details in the Calibo Accelerate platform, a brief description always helps you identify the saved connection details easily. Subscription ID A GUID that uniquely identifies your subscription to use Azure services. Tenant ID Provide the Microsoft Entra tenant ID that is used for authenticating requests to the key vault. Client ID This is the unique Application (client) ID assigned to your app by Microsoft Entra when the app was registered. To find your Application (Client) ID in your Azure subscription, go to Microsoft Entra > Enterprise applications > Application ID. Client Secret This is the secret string that your application uses to authenticate itself while requesting a token from Azure Key Vault. - To password-protect your Azure Key Vault connection details, enable the Secure configuration details with a password option, enter a password, and then retype it to confirm.
This is optional but recommended. When you share the connection details with multiple users, password protection helps you ensure authorized access to the connection details.
-
Click Test Connection to check if you can connect to the configured Azure Key Vault subscription successfully.
-
After you save and activate the configured connection details, you can see them listed on the Cloud Platform, Tools & Technologies screen.
Google Secret Manager
Prerequisites
-
A Google Cloud project with the Secret Manager API enabled.
-
Permissions to view/manage secrets in the target project.
-
If using Workload Identity: ability to create a Workload Identity Pool and Provider in Google Cloud, and to configure AWS as the trusted identity source.
-
If using Service Account: a Google Cloud service account key (JSON) with the required Secret Manager IAM roles.
-
To save the connection properties of your Google Secret Manager configuration, provide the following details:
-
Name: Enter a unique name for the configuration.
-
Description: Enter a description that helps users identify the purpose of the configuration.
-
Project ID - Enter the unique ID of the Google Cloud project that contains the secrets.
-
Under Select Authentication Method, select one of the following options:
-
Workload Identity (Recommended)
Workload Identity Federation lets Calibo Accelerate authenticate to Google Cloud using your AWS identity, without storing a static key.
-
Select Workload Identity as the authentication method.
-
Note the AWS account details displayed on the form — you will use these when configuring the Workload Identity Pool Provider in Google Cloud.
-
Click View Setup Guide to open the Setup Guide for Workload Identity Federation, which offers three tabs: Manual Setup, Generate Script, and Permissions.
-
Manual Setup
Follow these steps to configure Workload Identity Federation manually:
Task Details Enable Required APIs Enable the IAM, Security Token Service (STS), and IAM Credentials APIs. Create a Workload Identity Pool Create a Workload Identity Pool in your Google Cloud project. Create a Workload Identity Provider Configure an AWS provider within the pool and trust the AWS account shown on the setup guide page. Create or Select a Service Account Use an existing service account or create a new one for the federated workload. Configure IAM Access Grant the required Workload Identity Federation and application-specific permissions to the service account (see Permissions below). Retrieve Project Information Locate your Google Cloud Project Number. Complete Configuration Enter the collected values into the configuration form and save your changes. For more information, see Workload Identity Federation in the Google Cloud Documentation.
-
Generate Script
As an alternative to the manual steps, generate or use the script template provided in the setup guide:
-
Open the Generate Script tab. You can also use the script template displayed on the Manual Setup tab.
-
Enter the Project ID, Project Number, Pool ID, Provider Name, and Service Account Name. Click Generate Script, review the generated script, and then copy or download and run the script in your environment (requires the gcloud CLI, authenticated with sufficient privileges). At a high level, the script:
-
Sets the active project (gcloud config set project).
-
Optionally enables the Secret Manager API for the project.
-
Creates the service account if it doesn't already exist.
-
Grants the service account the roles/secretmanager.secretAccessor and roles/secretmanager.viewer IAM roles at the project level.
-
Configures the Workload Identity Pool/Provider bindings for the trusted AWS role.
-
-
After the script completes, record the resulting Service Account Email, Project Number, Pool ID, and Provider ID. You need these values to complete the configuration form.
-
-
Permissions:
On the Permissions tab, verify that the Google Cloud service account has the following IAM roles:
Resource IAM role Purpose Secret Manager roles/secretmanager.secretAccessor Allows the service account to access secret values for all secrets in this project. Secret Manager roles/secretmanager.viewer Allows the service account to view secret metadata for all secrets in this project.
-
-
After completing the Google Cloud setup, close the setup guide and enter the following values:
Field Description Service Account Email Enter the email address of the Google Cloud service account that the federated workload will impersonate. For example, calibo-secret-reader@my-project.iam.gserviceaccount.com. Project Number Enter the numeric identifier of the Google Cloud project that contains the workload identity pool. Pool ID Enter the unique ID of the workload identity pool. Provider ID Enter the unique ID of the AWS provider created in the workload identity pool. -
-
Service Account
-
Select Service Account as the authentication method.
-
Click View Setup Guide to open the Setup Guide for Service Account, which offers two tabs: Manual Setup and Permissions.
-
Manual Setup
Follow these steps to create and configure the service account:
Task Details Create or Select a Service Account Create a new service account or select an existing one that will be used by this integration. Assign Required IAM Roles Grant the service account the required IAM roles based on the Google Cloud resources it needs to access (see Permissions below). Create a Service Account Key Generate a JSON key for the service account and securely download it. For more information, see Create service accounts in the Google Cloud Documentation.
-
Use the Script Template
As an alternative to the manual steps, you can use the provided script template:
-
Click the download icon to save the script, or the copy icon to copy it to your clipboard.
-
Replace the placeholder values with your configuration details.
-
Run the script in your environment (requires the gcloud CLI, authenticated with sufficient privileges). At a high level, the script:
-
Sets the active project (gcloud config set project).
-
Optionally enables the Secret Manager API for the project.
-
Creates the service account if it doesn't already exist.
-
Grants the service account the roles/secretmanager.secretAccessor and roles/secretmanager.viewer IAM roles at the project level.
-
-
Generate and download the service account's JSON key (if required), then proceed to complete the configuration form.
-
Permissions
On the Permissions tab, verify that the service account has the following IAM roles:
Resource IAM role Purpose Secret Manager roles/secretmanager.secretAccessor Allows the service account to access secret values for all secrets in this project. Secret Manager roles/secretmanager.viewer Allows the service account to view secret metadata for all secrets in this project. -
Close the setup guide.
-
Under Upload Service Account JSON, drag the JSON key file to the upload area, or click Browse this computer and select the file.
-
Verify that Calibo Accelerate automatically populates the following read-only fields from the uploaded file:
Field Description Service Account Email Displays the service account email from the client_email property in the JSON key. Private Key ID Displays the identifier from the private_key_id property in the JSON key.
-
-
-
-
-
To password-protect your Google Secret Manager configuration details, enable the Secure configuration details with a password option, enter a password, and then re-enter it to confirm.
This is optional but recommended. When you share the configuration with multiple users, password protection helps ensure that only authorized users can access the connection details. -
Click Test Connection to verify that Calibo Accelerate can successfully connect to the configured Google Secret Manager instance.
-
After you Save and Activate the configuration, it is listed on the Cloud Platform, Tools & Technologies screen and can be used by other platform integrations to retrieve secrets securely.
-
| What's next? Configure Source Code Repository Connection Details |