Support Request
The Calibo Accelerate platform uses Jira Service Management (JSM) to manage technical support requests. In this section, you will learn how to create a support request from the Calibo Accelerate platforminterface, via email, or from the JSM portal and how to manage and track your requests.
Contents
Creating a Support Request
You can create a technical support request through any of the following channels:
Creating a Support Request from Calibo Accelerate platform Interface
-
In the right side of any screen of the Calibo Accelerate platform, click Support Request.
-
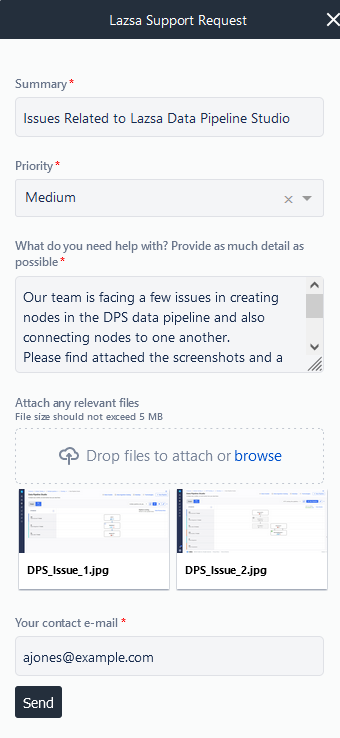
In the Calibo Accelerate Support Request dialog box, provide the following details:
Field Description Summary Provide a brief summary of the issue you are facing. Keep it concise and to the point. Priority Select the priority level of your issue from the dropdown list. Here is what each priority level means.
-
Highest: The issue critically affects your operations and needs immediate attention.
-
High: The issue significantly impacts your operations but is not an emergency.
-
Medium: The issue affects your operations but is manageable temporarily.
-
Low: The issue is minor and does not significantly impact your operations.
Assess the impact on your operations before selecting the priority. A realistic urgency of the request helps our support team prioritize effectively.
What do you need help with? Provide as much detail as possible Provide as much detail as possible about the issue you need help with. Here are a few tips:
-
Describe the steps you took leading up to the issue.
-
Mention any error messages or codes you encountered.
-
Specify any configurations or settings related to the problem.
-
Include relevant details about your environment.
Attach any relevant files Attach any files that might help the support team understand and resolve your issue.
Attach screenshots of error messages, log files, configuration files, or any other relevant documents.
Ensure the file size does not exceed 5 MB.
Your contact email Enter your valid email address for the support team to contact you. You receive email notifications on this email address. -
-
Click Send.
Creating a Support Request via Email
-
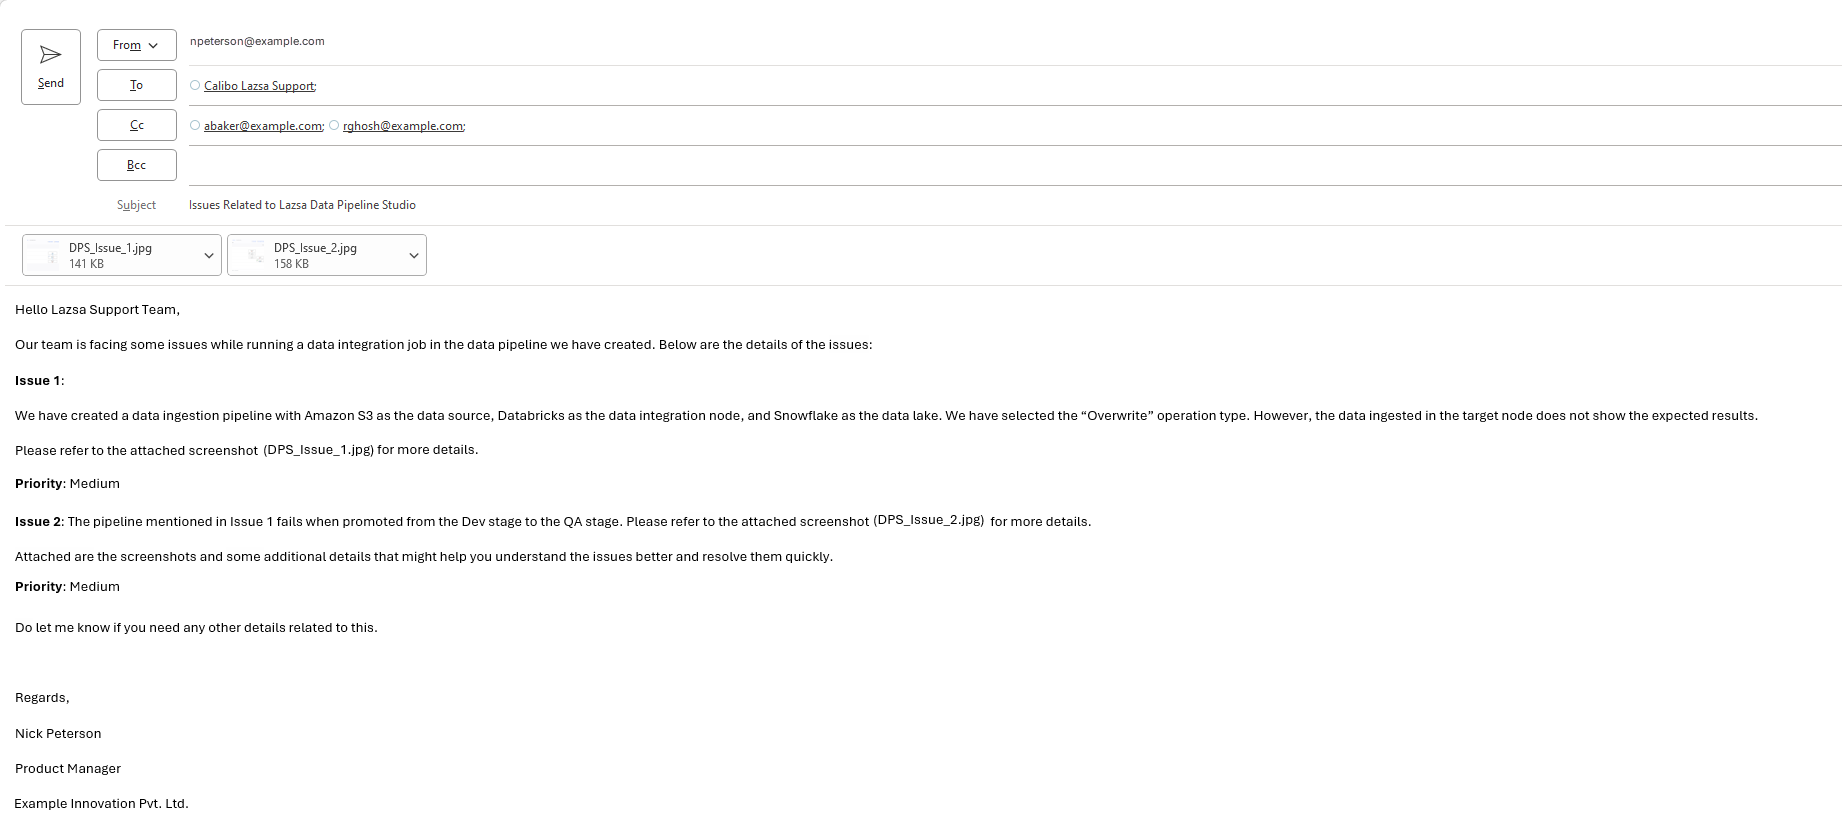
In your preferred email application, compose a new email.
-
In the email body, provide a detailed description of the issue you are facing. You can include the following points:
-
Summary
Provide a brief summary of the issue you are facing. Keep it concise and to the point. -
Priority
Specify the priority level (Highest, High, Medium, Low). -
Details
Provide as much detail as possible about the issue, including steps to reproduce, error messages, and any relevant configuration settings.
-
-
Attach any files that might help the support team understand and resolve your issue. This can include screenshots, log files, and configuration files, among others.
-
Send the email to the Calibo Accelerate support email address: lazsa-support@calibo.com.
-
After your support request is created, you receive the ticket details on the same email ID you used to send the request.
Creating a Support Request Using JSM Portal
-
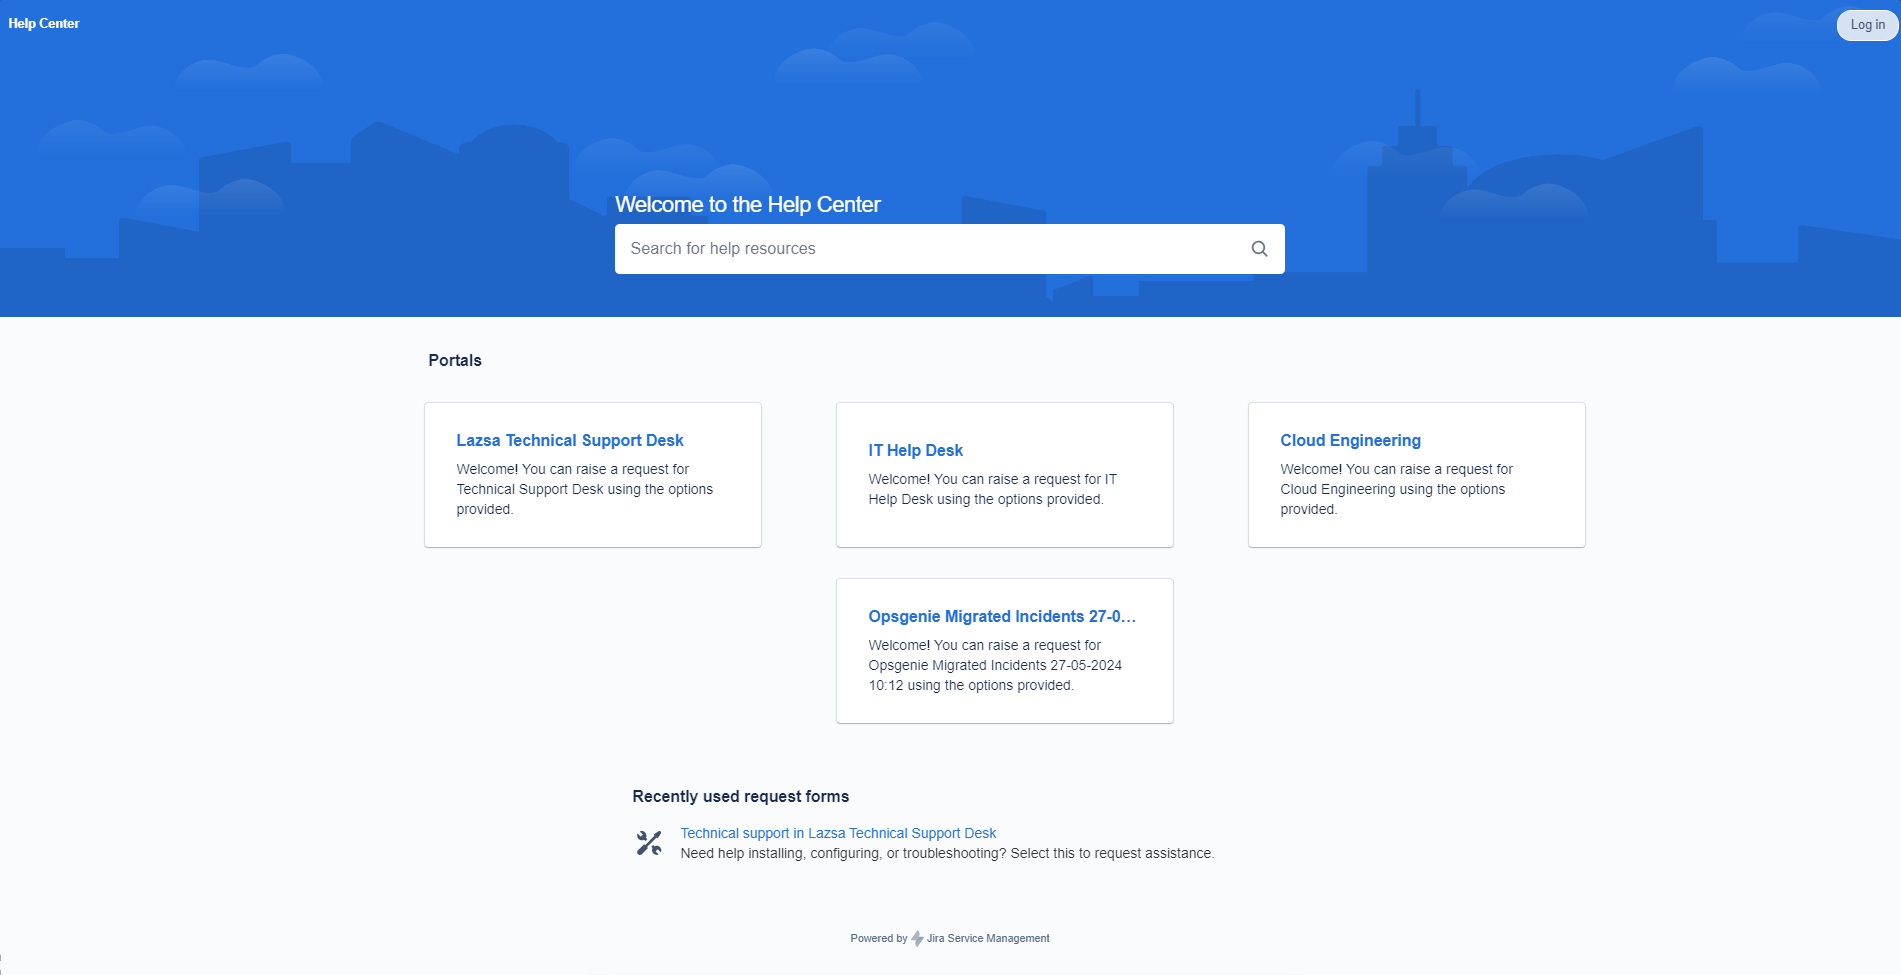
On the Help Center welcome screen, click Calibo AccelerateTechnical Support Desk.
-
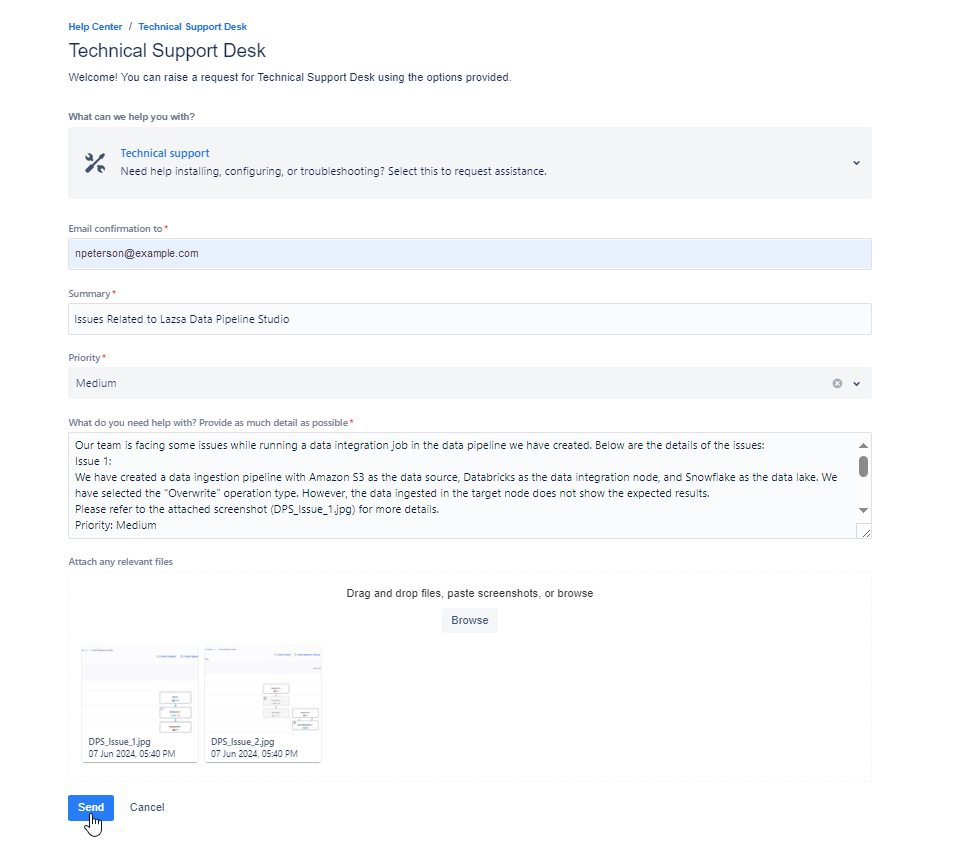
In the Technical Support Desk request form, in the Email confirmation to field, enter your email address.
-
Provide a summary of the issue.
-
Select the priority level (Highest, High, Medium, Low).
-
Provide as much detail as possible about the issue, including steps to reproduce, error messages, and any relevant configuration settings.
-
Attach any relevant files that might help the support team understand and resolve your issue. This can include screenshots, log files, and configuration files, among others.
-
Click Send.
Email Notifications Related to Status Transitions of a Logged Request
The Calibo Accelerate platform ensures that you stay informed about the progress of your support requests through email notifications. These notifications help you keep track of the status of your tickets and any updates or actions taken by the support team. The following are the different scenarios where you receive email notifications related to the status transitions of your logged tickets.
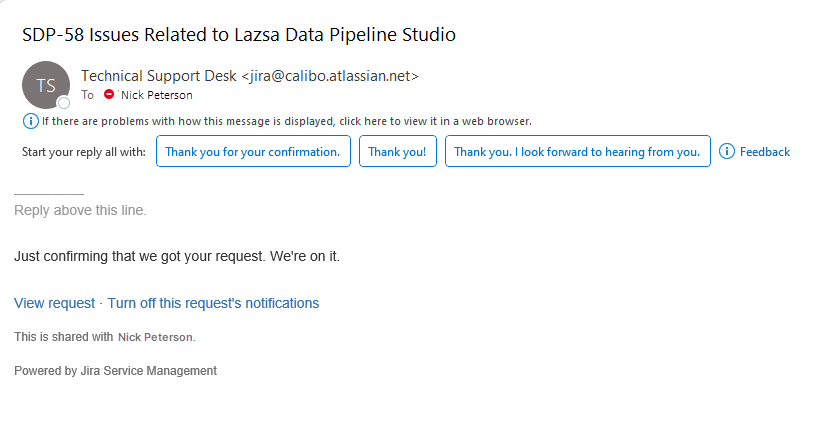
When a ticket is created via any supported channel (Calibo Accelerate platform interface, email, or JSM portal)
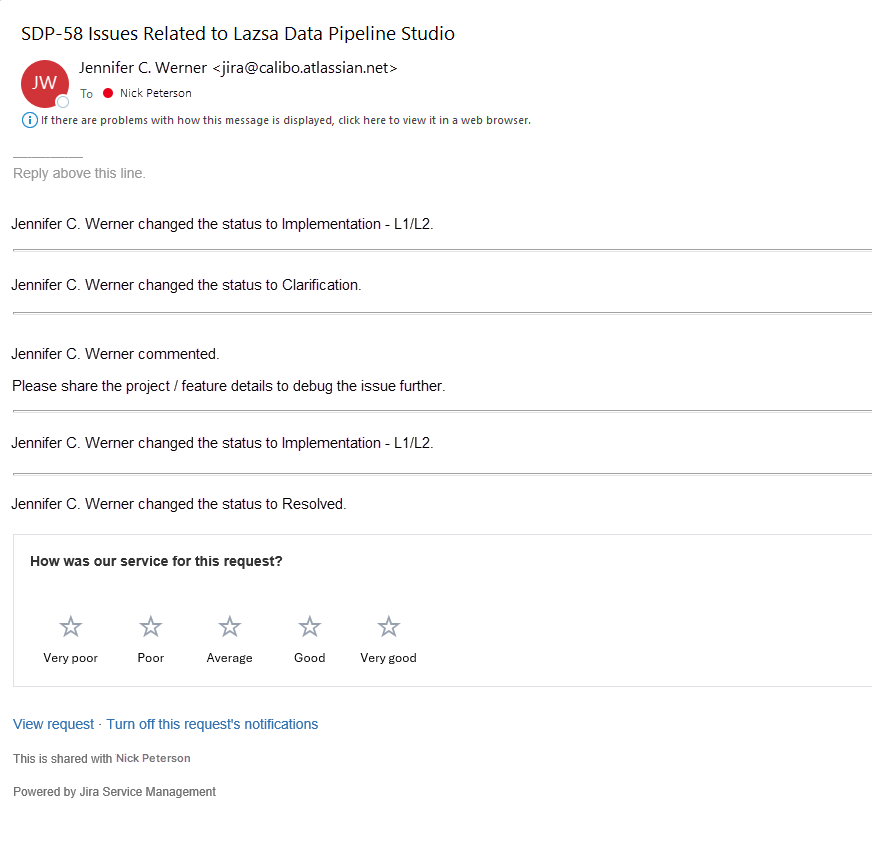
When the ticket status changes
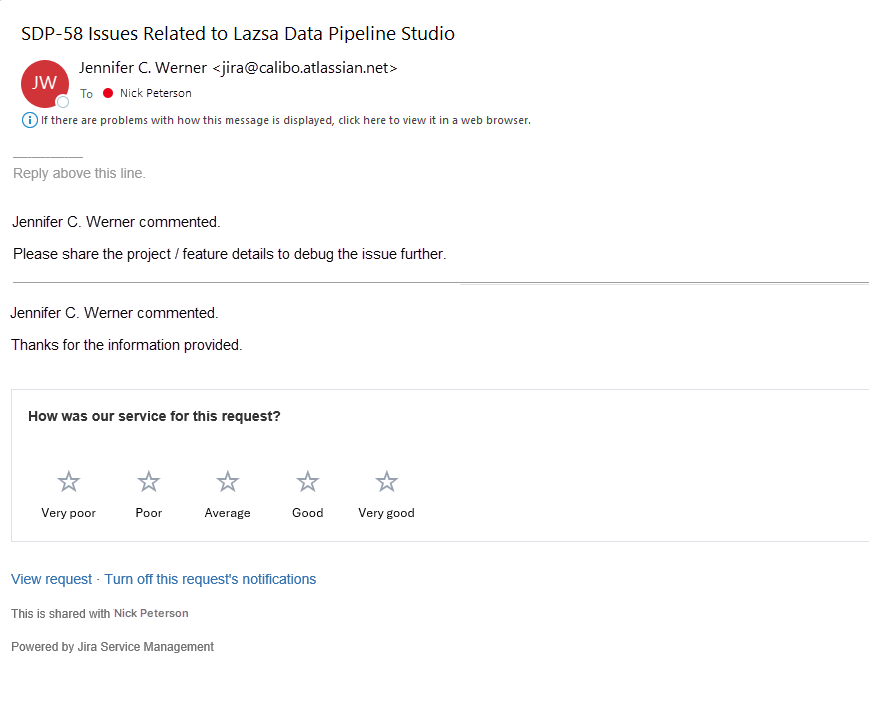
When an agent adds a comment on the ticket
Accessing Requests Created by You
To view the history of support tickets you have logged on the JSM portal, do the following:
-
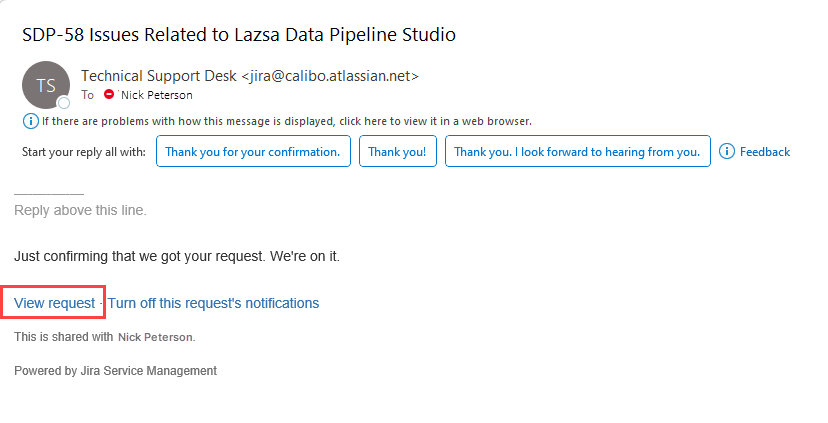
After a request is created, you receive an email notification. Click the View request link in the notification email. You are redirected to the Jira Service Management (JSM) portal.
-
Sign in to the portal using your user credentials.

Note:
If this is your first time creating a request, you must create a JSM account to access your logged requests. This is a one-time activity.
-
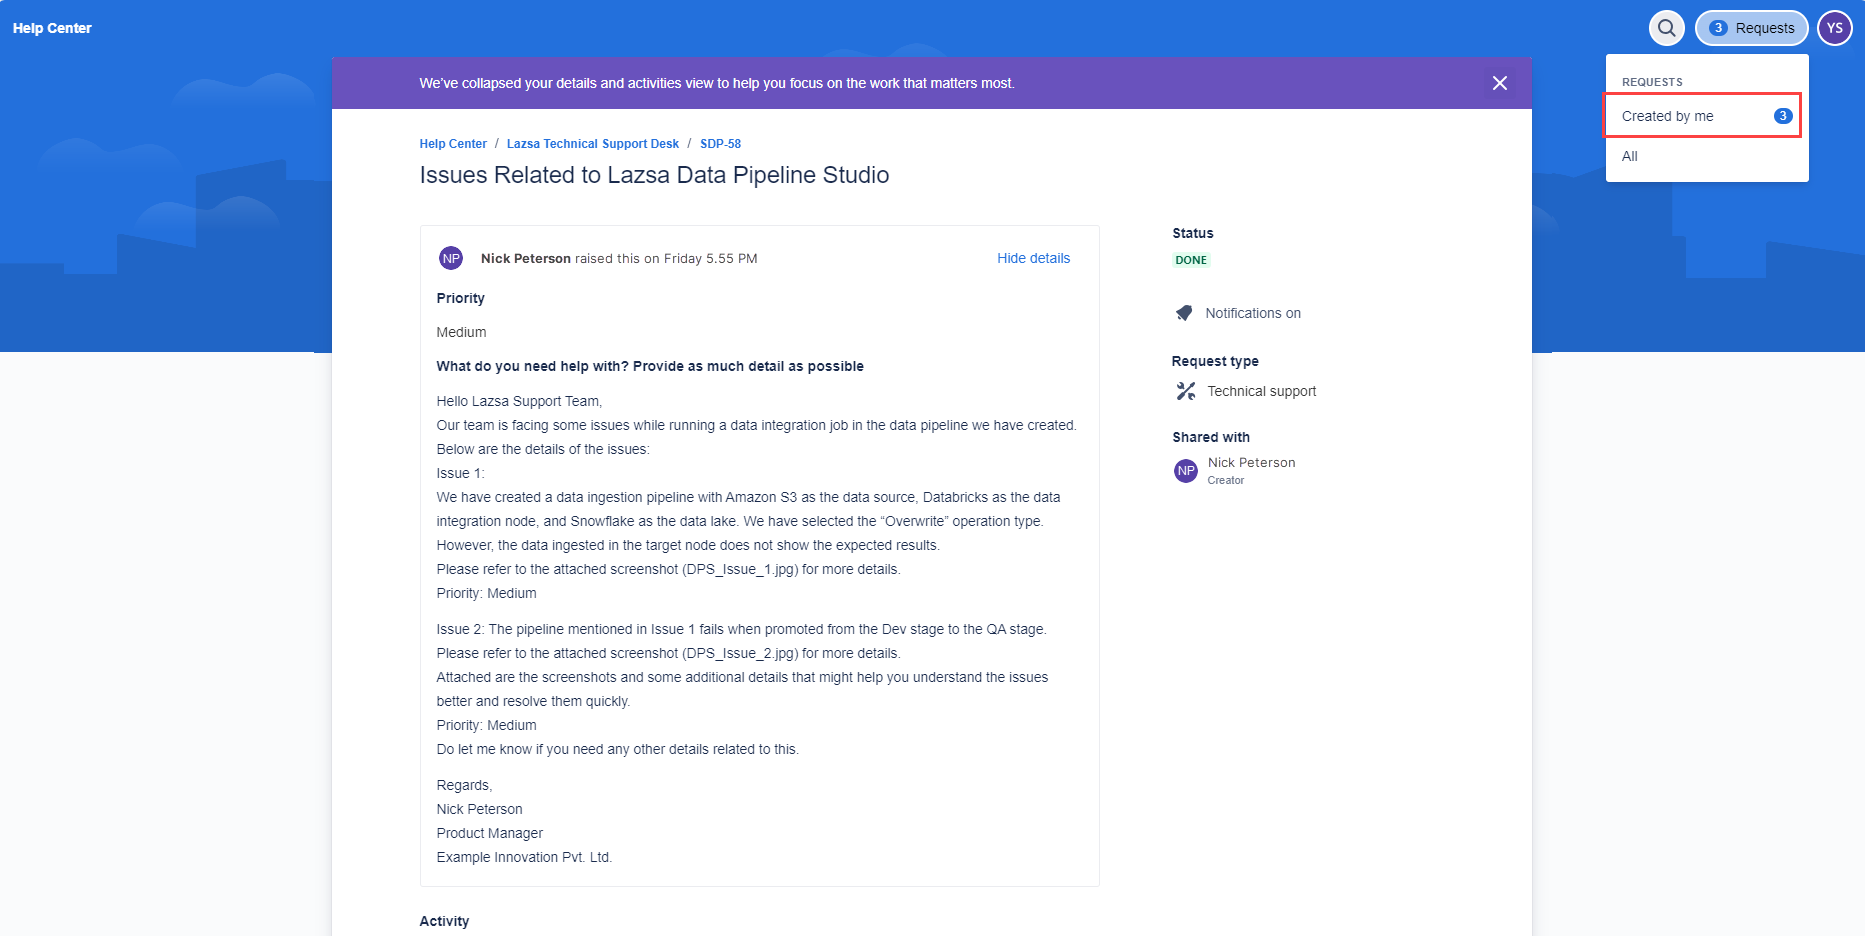
After you sign in, the ticket associated with the "View Request" link you clicked from the email notification is displayed. To view all the requests you have created, click Requests the upper right corner and then click Created by me.
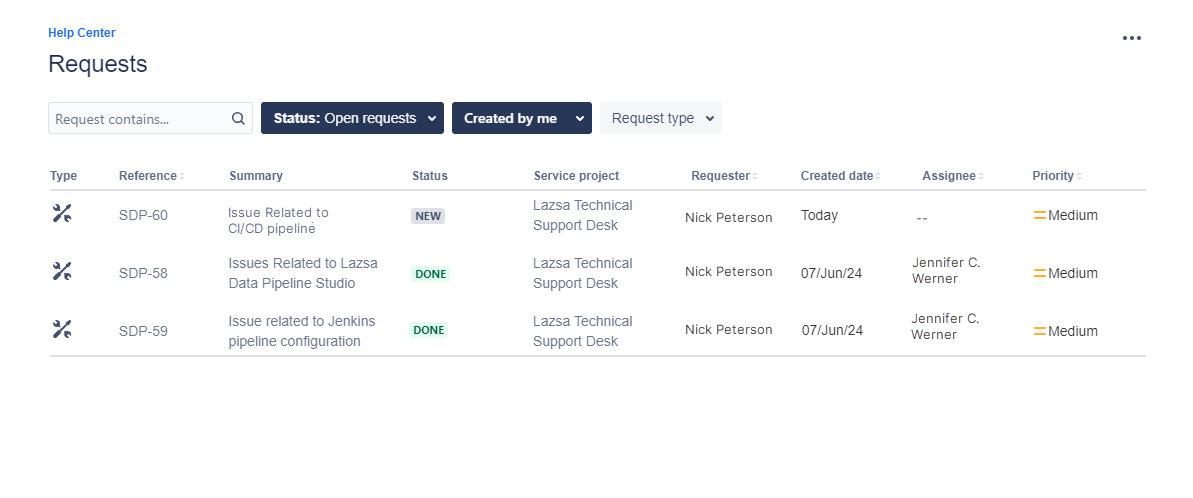
All the requests that you have created are listed. Click the request reference ID to view the details of that request.
Following Up on a Request Created by You
To follow up on a request that you have created, do the following:
-
Sign in to the Jira Service Management (JSM) portal.
If this is your first time accessing the portal, you may need to create a JSM account, which is a one-time activity. -
After you sign in, click Requests in the upper right corner.
-
Click Created by me. All the requests that you have created are listed.
-
Click the request reference ID (on which you want to follow up) to open the detailed view of that request.
-
In the detailed view, review all the information related to your request, including the current status, updates, comments from the support team, and any actions taken.
-
Add a comment or additional information if needed to follow up on the progress of your request. Save your comment.
Canceling a Request Created by You
To cancel a request that you have created, do the following:
-
Sign in to the Jira Service Management (JSM) portal.
-
After you sign in, click Requests in the upper right corner.
-
Click Created by me. All the requests that you have logged are listed.
-
Look for the specific request you want to cancel. Click the request reference ID to open the detailed view of that request.
-
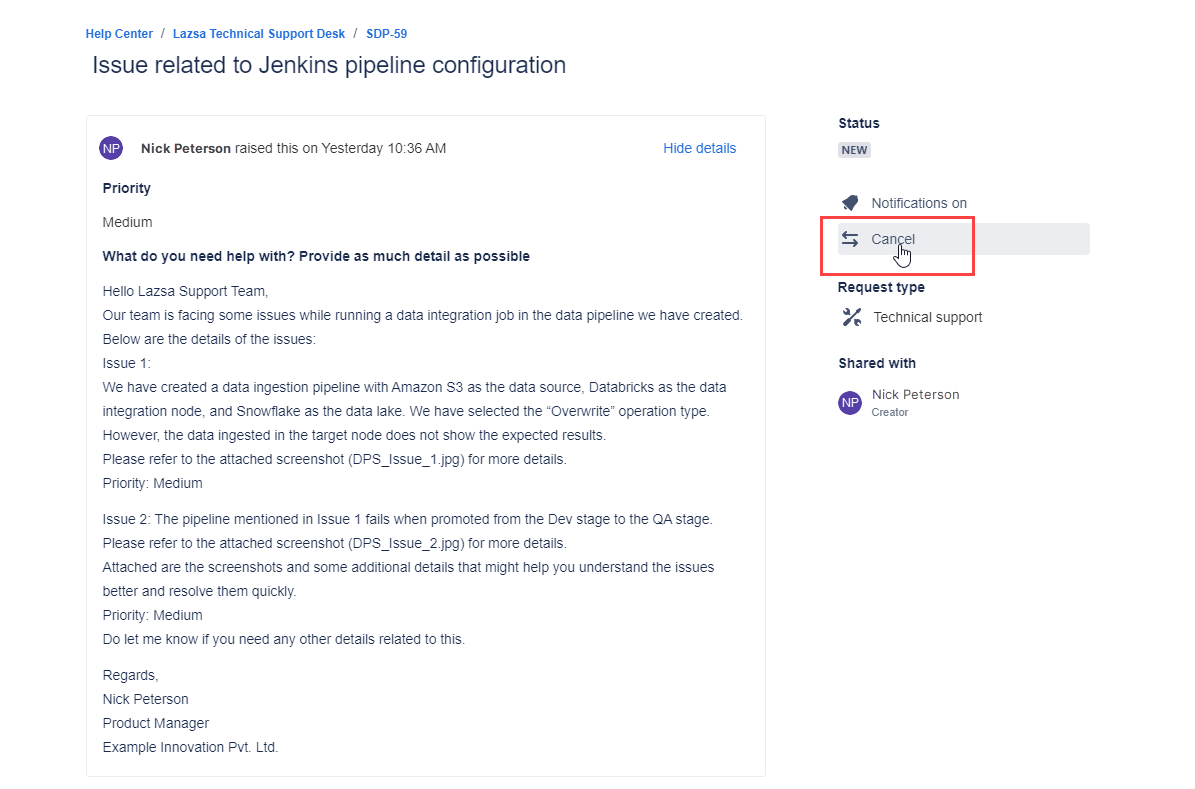
In the detailed view, click Cancel.
-
Add a comment explaining why you are canceling the request. This helps the support team understand the reason for the cancellation and keeps a record for future reference.
-
Click Cancel to confirm the cancellation of your request.
Reviewing Support Requests Created for Your Organization
Note:
This view is restricted to managers or supervisors and requires a special access. For more details, please contact the Calibo Accelerate technical support team.
To review the support requests created by your team for your organization, do the following:
-
Sign in to the portal using your user credentials.

Note:
If this is your first time creating a request, you must create a JSM account to access your logged requests. This is a one-time activity.
-
After you sign in, click Requests in the upper right corner, and then from the dropdown menu, click your organization's name.
The list of support requests created for your organization is displayed. You can review all the requests created by your team, including their statuses and details.
Following Up on a Request Created by Your Team
Note:
This view is restricted to managers or supervisors and requires a special access. For more details, please contact the Calibo Accelerate technical support team.
To follow up on any request created by your team member, do the following:
-
Sign in to the Jira Service Management (JSM) portal.
-
After you sign in, click Requests in the upper right corner, and then from the dropdown menu, click your organization's name. The list of support requests created for your organization is displayed.
-
Click the request reference ID (on which you want to follow up) to open the detailed view of that request.
-
In the detailed view, review all the information related to the request, including the current status, updates, comments from the support team, and any actions taken.
-
Add a comment or additional information if needed to follow up on the progress of the request. Save your comment.
Canceling a Request Created by Your Team
Note:
This view is restricted to managers or supervisors and requires a special access. For more details, please contact the Calibo Accelerate technical support team.
To cancel a request created by your team member, do the following:
-
Sign in to the Jira Service Management (JSM) portal.
-
After you sign in, click Requests in the upper right corner, and then from the dropdown menu, click your organization's name. The list of support requests created for your organization is displayed.
-
Click the reference ID of the request that you want to cancel.
-
In the detailed view, click Cancel.
-
Add a comment explaining why you are canceling the request. This helps the support team understand the reason for the cancellation and keeps a record for future reference.
-
Click Cancel to confirm the cancellation of the request.
